홈서버 및 Oracle 서버 세팅
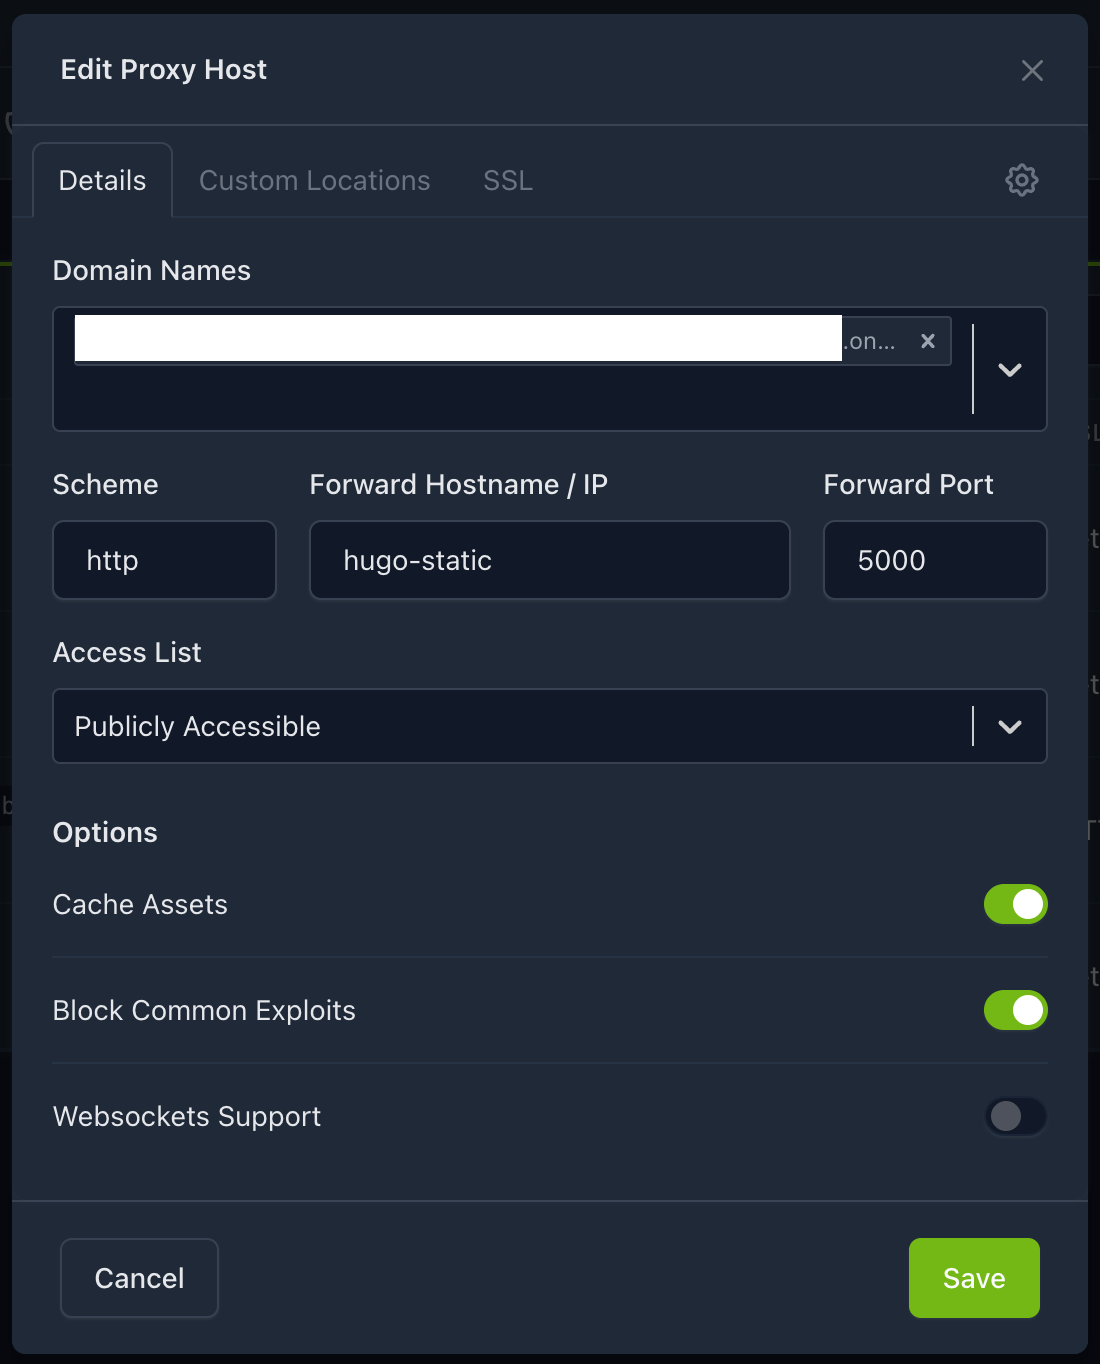
홈서버와 Oracle cloud 서버를 초기화 하고 다시 세팅할 때 내 환경에 맞춰 쉽게 세팅할 수 있도록 기록한다. 쉘 명령은 한 줄 씩 실행하면 되고, docker-compose.yml 파일은 서버 환경에 맞춰 알아서 작성하면 된다. 홈서버 (Debian 13) 첫 설치 시 lvm + luks2 설정하기 root 로그인 금지 공유기에서 필수 포트만 열기 # 사용자 관리자 권한 주기 sudo -i usermod -aG sudo <username> exit # 노트북 덮개 닫아도 절전되지 않게 sudo sed -i 's/^#\?HandleLidSwitch=.*/HandleLidSwitch=ignore/' /etc/systemd/logind.conf && sudo systemctl restart systemd-logind 패키지 설치 # 업데이트 sudo apt update -y sudo apt upgrade -y # 패키지 설치 sudo apt install nala -y sudo nala install zsh git curl wget htop btop net-tools nano vim -y # Python 설치 sudo nala install python3 python3-pip python3-venv build-essential -y python3 --version # Node.js 설치 curl -o- https://raw.githubusercontent.com/nvm-sh/nvm/v0.40.4/install.sh | bash export NVM_DIR="$HOME/.nvm" [ -s "$NVM_DIR/nvm.sh" ] && \. "$NVM_DIR/nvm.sh" [ -s "$NVM_DIR/bash_completion" ] && \. "$NVM_DIR/bash_completion" source ~/.bashrc nvm install node node -v; npm -v # 터미널 설정 sh -c "$(curl -fsSL https://raw.githubusercontent.com/ohmyzsh/ohmyzsh/master/tools/install.sh)" git clone --depth=1 https://github.com/romkatv/powerlevel10k.git ~/.powerlevel10k echo 'source ~/.powerlevel10k/powerlevel10k.zsh-theme' >>~/.zshrc source ~/.zshrc # p10k 초기 설정 sed -i 's/POWERLEVEL9K_CONTEXT_{REMOTE,REMOTE_SUDO}_TEMPLATE=.*/POWERLEVEL9K_CONTEXT_{REMOTE,REMOTE_SUDO}_TEMPLATE="%n"/' ~/.p10k.zsh && sed -i 's/POWERLEVEL9K_TIME_FORMAT=.*/POWERLEVEL9K_TIME_FORMAT="%D{%H:%M}"/' ~/.p10k.zsh && source ~/.p10k.zsh git clone https://github.com/zsh-users/zsh-autosuggestions ${ZSH_CUSTOM:-~/.oh-my-zsh/custom}/plugins/zsh-autosuggestions 2>/dev/null || true; grep -q "zsh-autosuggestions" ~/.zshrc || echo -e "\n# zsh-autosuggestions\nsource ${ZSH_CUSTOM:-~/.oh-my-zsh/custom}/plugins/zsh-autosuggestions/zsh-autosuggestions.zsh" >> ~/.zshrc; source ~/.zshrc git clone https://github.com/zsh-users/zsh-syntax-highlighting ${ZSH_CUSTOM:-~/.oh-my-zsh/custom}/plugins/zsh-syntax-highlighting 2>/dev/null || true; grep -q "zsh-syntax-highlighting" ~/.zshrc || echo -e "\n# zsh-syntax-highlighting\nsource ${ZSH_CUSTOM:-~/.oh-my-zsh/custom}/plugins/zsh-syntax-highlighting/zsh-syntax-highlighting.zsh" >> ~/.zshrc; source ~/.zshrc sudo nala install eza autojump -y grep -q "plugins=.*autojump" ~/.zshrc || sed -i -E 's/^plugins=\(([^)]*)\)/plugins=(\1 autojump)/' ~/.zshrc && source ~/.zshrc grep -q "alias ls='eza --icons --group-directories-first'" ~/.zshrc || echo -e "\n# eza aliases\nalias ls='eza --icons --group-directories-first'\nalias ll='eza -lah --icons --group-directories-first --no-user'\nalias lt='eza -T --icons'" >> ~/.zshrc; source ~/.zshrc # Docker 설치 sudo apt remove $(dpkg --get-selections docker.io docker-compose docker-doc podman-docker containerd runc | cut -f1) sudo nala update sudo nala install ca-certificates -y sudo install -m 0755 -d /etc/apt/keyrings sudo curl -fsSL https://download.docker.com/linux/debian/gpg -o /etc/apt/keyrings/docker.asc sudo chmod a+r /etc/apt/keyrings/docker.asc printf "Types: deb\nURIs: https://download.docker.com/linux/debian\nSuites: $(. /etc/os-release && echo "$VERSION_CODENAME")\nComponents: stable\nSigned-By: /etc/apt/keyrings/docker.asc\n" | sudo tee /etc/apt/sources.list.d/docker.sources > /dev/null sudo nala update sudo nala install docker-ce docker-ce-cli containerd.io docker-buildx-plugin docker-compose-plugin -y sudo usermod -aG docker $USER && newgrp docker 보안 설정 # NEW_PORT에 원하는 ssh 포트 입력 NEW_PORT=2222; sudo sed -i "s/^#\?Port [0-9]*/Port $NEW_PORT/" /etc/ssh/sshd_config && sudo systemctl restart sshd # ssh key 설정 ssh-keygen -b 4096 # 로컬에서 실행 ssh-copy-id -p <port> -i <key> <username>@<host> # 로컬에서 실행 sudo sed -i 's/^#\?PasswordAuthentication.*/PasswordAuthentication no/' /etc/ssh/sshd_config && sudo sed -i 's/^#\?ChallengeResponseAuthentication.*/ChallengeResponseAuthentication no/' /etc/ssh/sshd_config && sudo sed -i 's/^#\?UsePAM.*/UsePAM no/' /etc/ssh/sshd_config && sudo systemctl restart sshd # ssh 방화벽 설정 sudo nala install fail2ban -y sudo systemctl enable fail2ban --now sudo cp /etc/fail2ban/jail.conf /etc/fail2ban/jail.local # PORT에 ssh 포트 입력 PORT=2222; sudo awk -v p="$PORT" 'BEGIN{in=0} /^\[sshd\]/{print "[sshd]\nenabled = true\nport = " p "\nfilter = sshd\nlogpath = /var/log/auth.log\nbackend = systemd\nmaxretry = 3\nfindtime = 10m\nbantime = 1h"; in=1; next} /^\[.*\]/{in=0} !in{print}' /etc/fail2ban/jail.local 2>/dev/null | sudo tee /etc/fail2ban/jail.local >/dev/null sudo systemctl restart fail2ban sudo fail2ban-client status sshd 서비스 배포 Nginx Proxy Manager services: app: image: "jc21/nginx-proxy-manager:latest" restart: unless-stopped environment: TZ: "Asia/Seoul" ports: - "80:80" - "81:81" - "443:443" volumes: - ./data:/data - ./letsencrypt:/etc/letsencrypt networks: - proxy networks: proxy: external: true portainer docker volume create portainer_data docker run -d -p 8000:8000 -p 9443:9443 --name portainer --restart=always -v /var/run/docker.sock:/var/run/docker.sock -v portainer_data:/data portainer/portainer-ce:lts nextcloud docker network create proxy services: db: image: mariadb:10.11 container_name: nextcloud-db restart: unless-stopped command: --transaction-isolation=READ-COMMITTED --log-bin=binlog --binlog-format=ROW volumes: - db:/var/lib/mysql environment: MYSQL_ROOT_PASSWORD: <password> MYSQL_DATABASE: nextcloud MYSQL_USER: nextcloud MYSQL_PASSWORD: <password> networks: - internal redis: image: redis:alpine container_name: nextcloud-redis restart: unless-stopped networks: - internal app: image: nextcloud:27-apache container_name: nextcloud-app restart: unless-stopped depends_on: - db - redis volumes: - nextcloud:/var/www/html environment: MYSQL_HOST: db MYSQL_DATABASE: nextcloud MYSQL_USER: nextcloud MYSQL_PASSWORD: <password> REDIS_HOST: redis PHP_MEMORY_LIMIT: 1G PHP_UPLOAD_LIMIT: 20G networks: - internal - proxy volumes: db: nextcloud: networks: internal: internal: true proxy: external: true Nginx Proxy Manager에서 아래와 같이 nextcloud reverse proxy를 설정한다. ...